In our first three posts, we improved content entry forms based on user experience best practices.
Another important aspect of maintaining a website is managing existing content. This is done through administration and reporting pages. Most of these pages are powered by the Views module, which is a robust query builder that is part of Drupal core. Like so many things Drupal, it allows you to have fine-grained control over what to show, how to show it, and provides extra goodies like exposed filters and sortable columns.
We’ll cover the key admin pages provided by Drupal core, but keep in mind that admin and reporting pages provided by contributed modules are often powered by Views as well. So, if there is an admin page that isn’t meeting your needs, chances are you can tweak it.
Content Admin Page
There are a few administration pages I look at over and over. One is the Content page, listing all of the content on the site.
Out of the box, Drupal assumes your website is multilingual. If it isn’t, there’s no need for that Language filter.
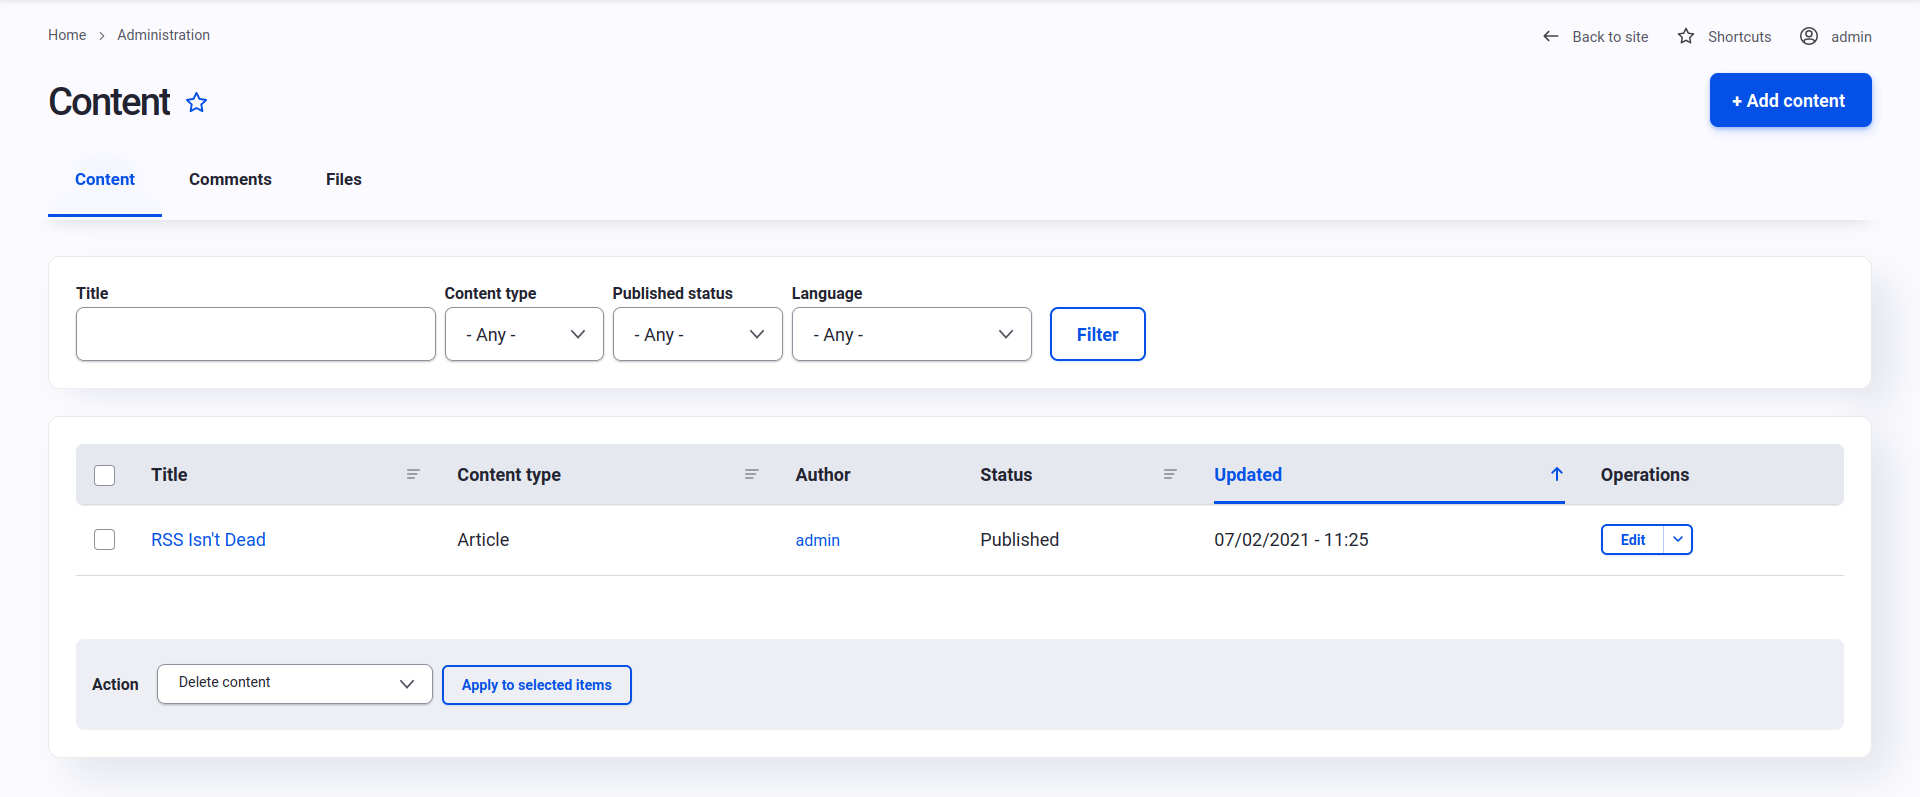
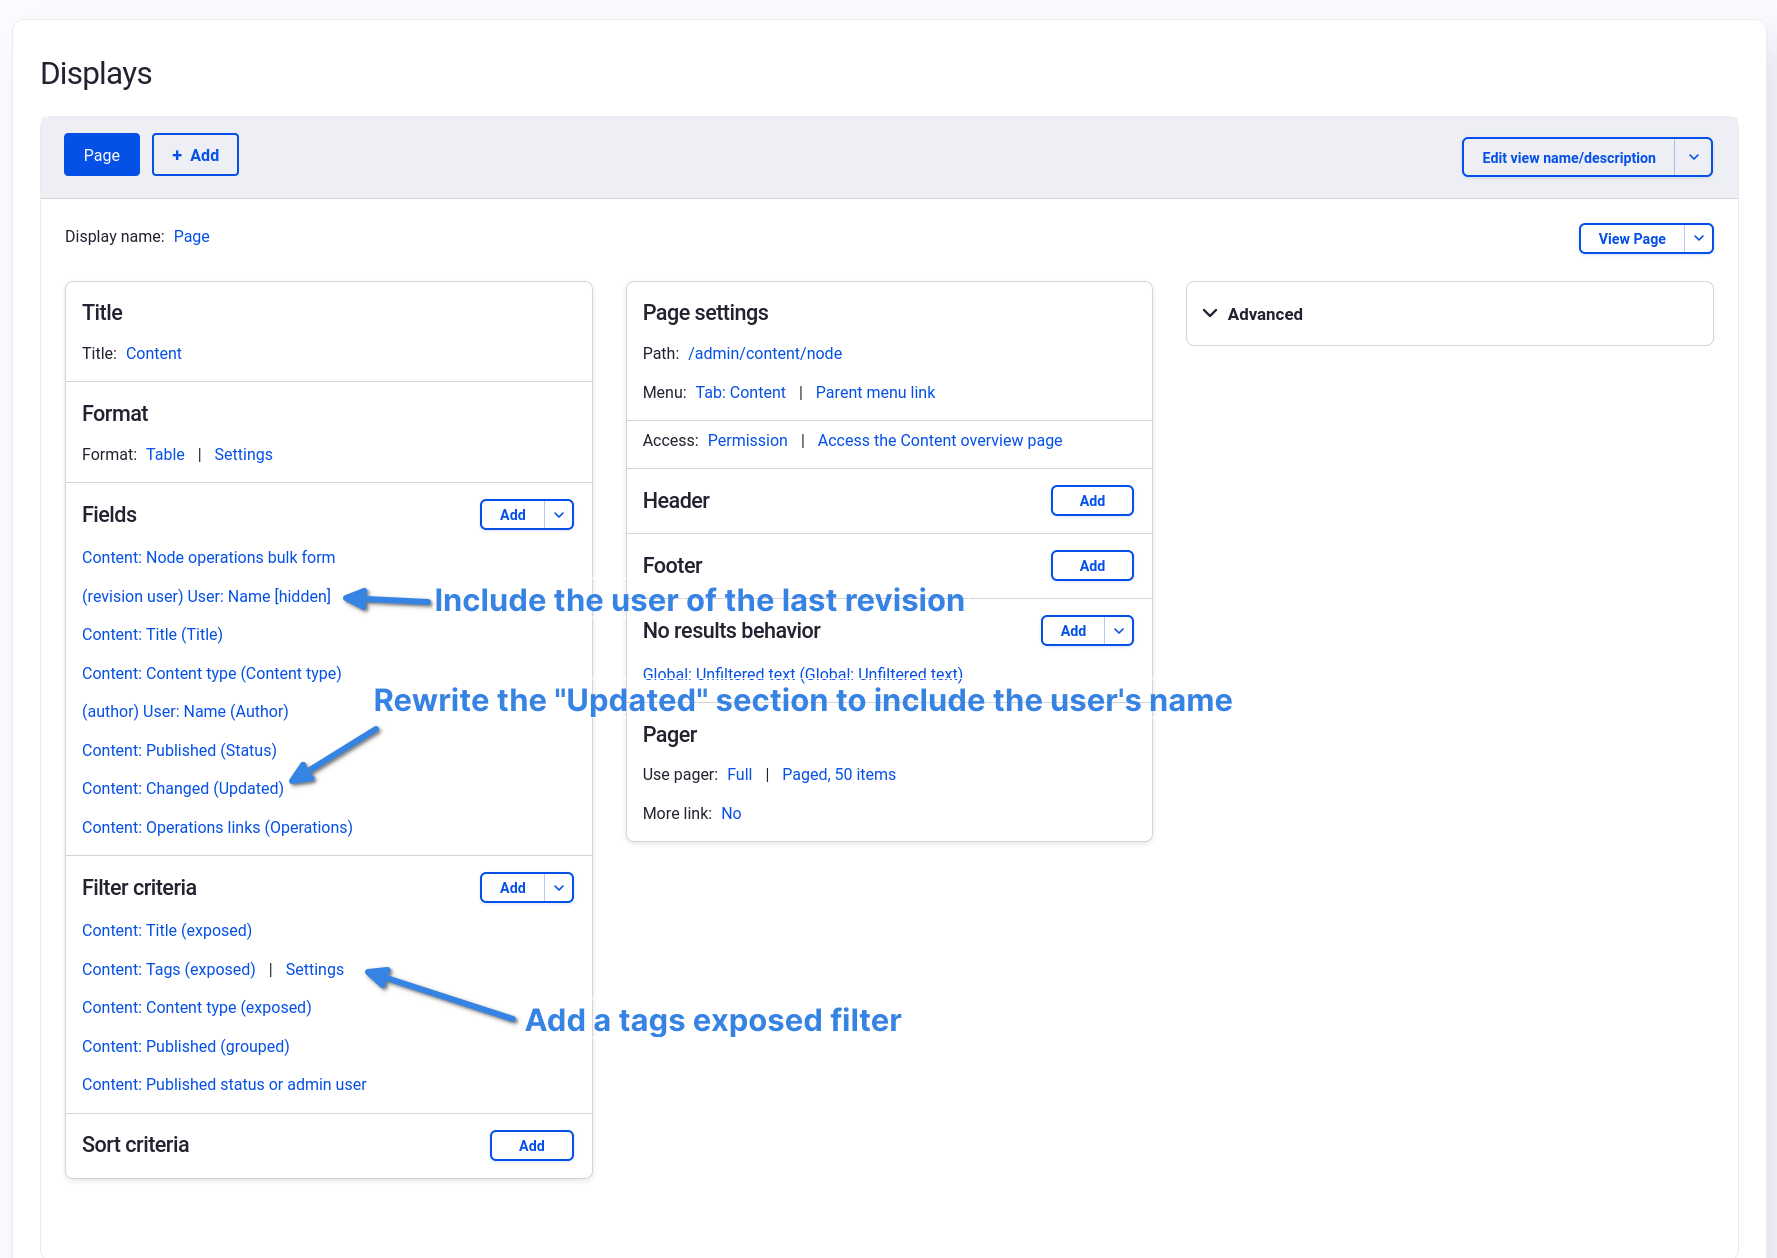
Conversely, there might be information about your content you do want to see that the Content page isn’t currently showing. A common one is tags, and the ability to filter all content by tag. Another is the last user to update a node.
Most of the administration pages are powered by the Views module, allowing for easy tinkering with what information is shown on the page, and what filters are available.
Edit the Content administration page at Structure > Views > Content
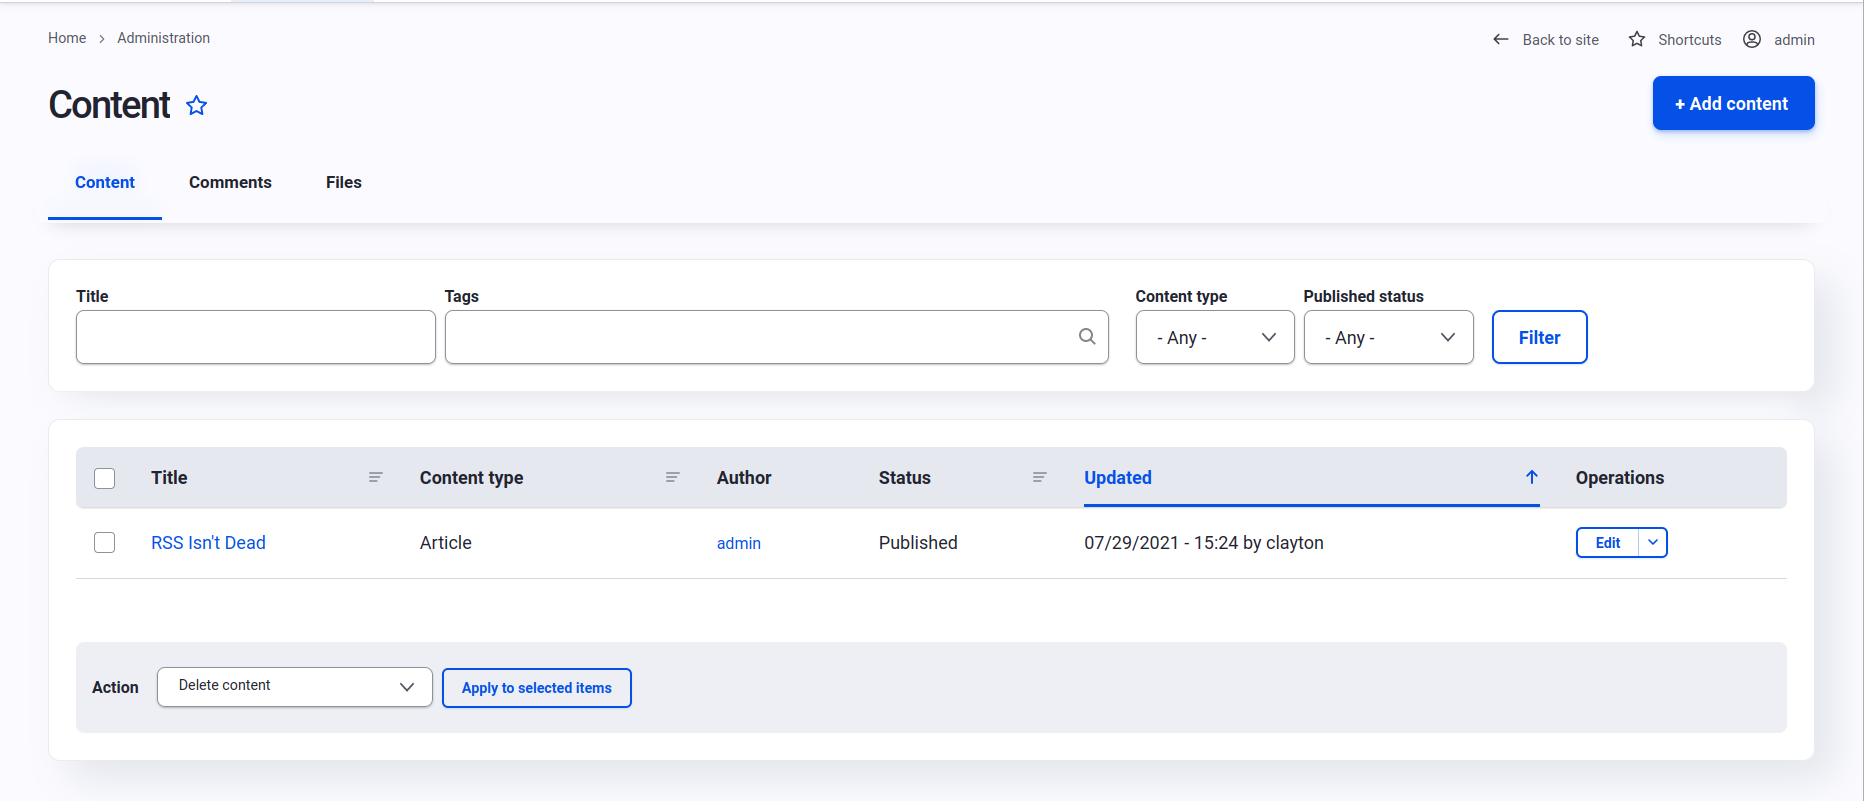
Here is the end result.
People Admin Page
Another common admin page is the People page, which lists all of the users on the site.
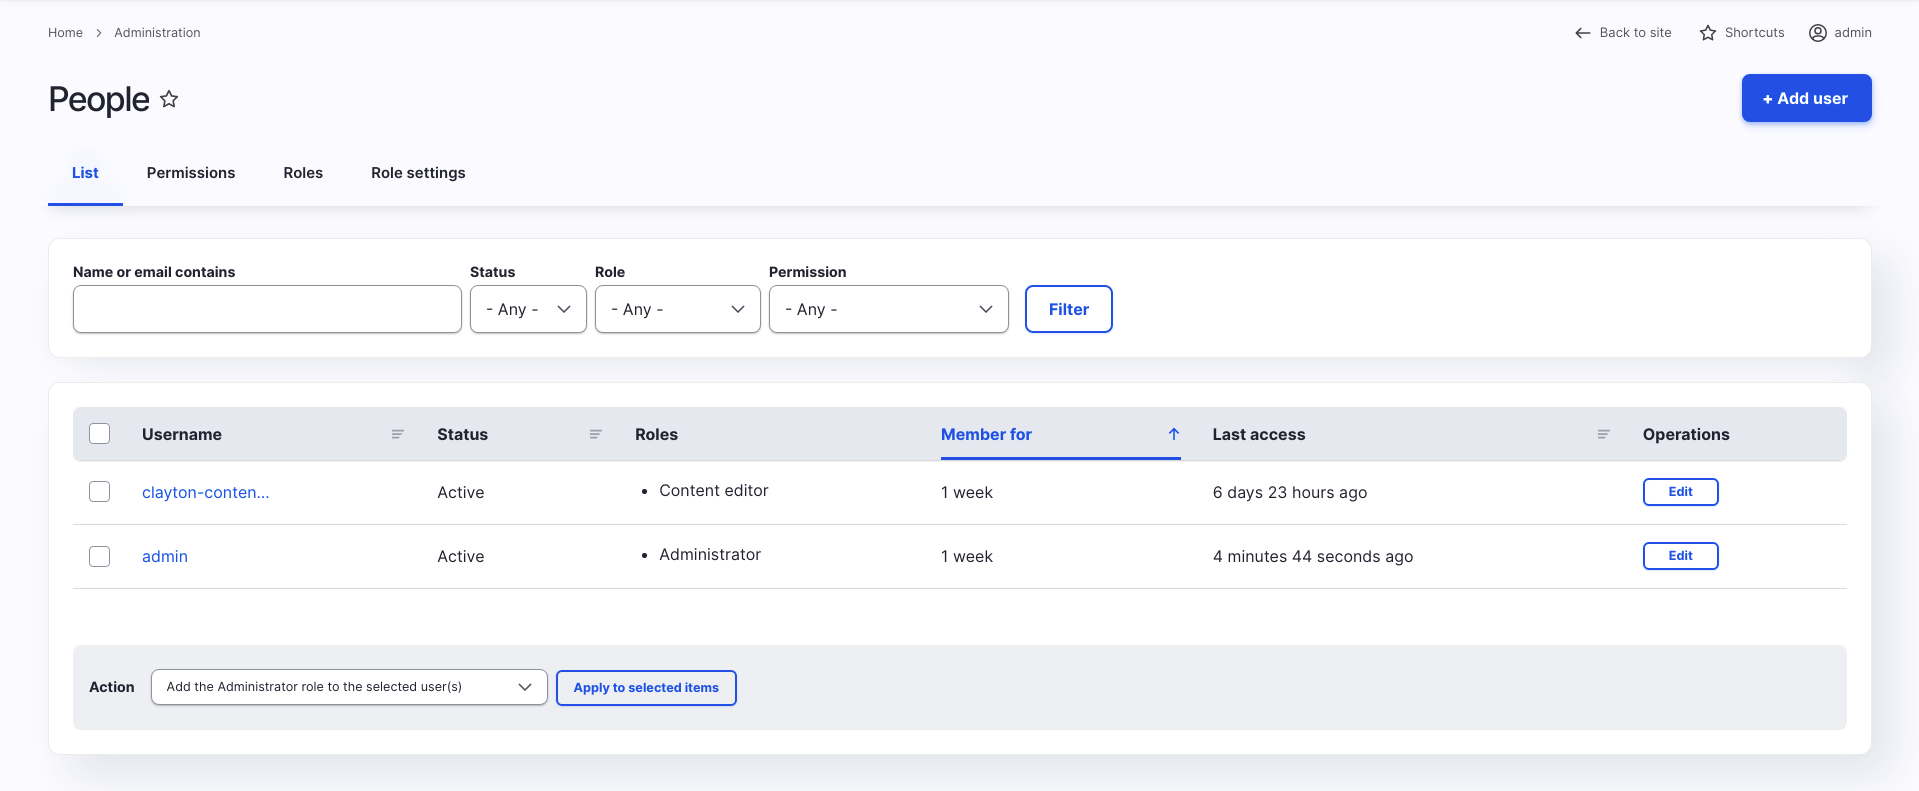
There may be some information that is helpful to surface for people who manage user accounts. For example, an account might have a name field you want to see.
Edit this View by navigating to Structure > Views > People, and just like you did for the Content admin page View, add the desired field under “Fields”, and save your View.
Block Admin Page
The Blocks administrative page is a bit overwhelming for editors. By default, there is only one Block-related permission, Administer blocks. This gives the role access to all blocks on the website.
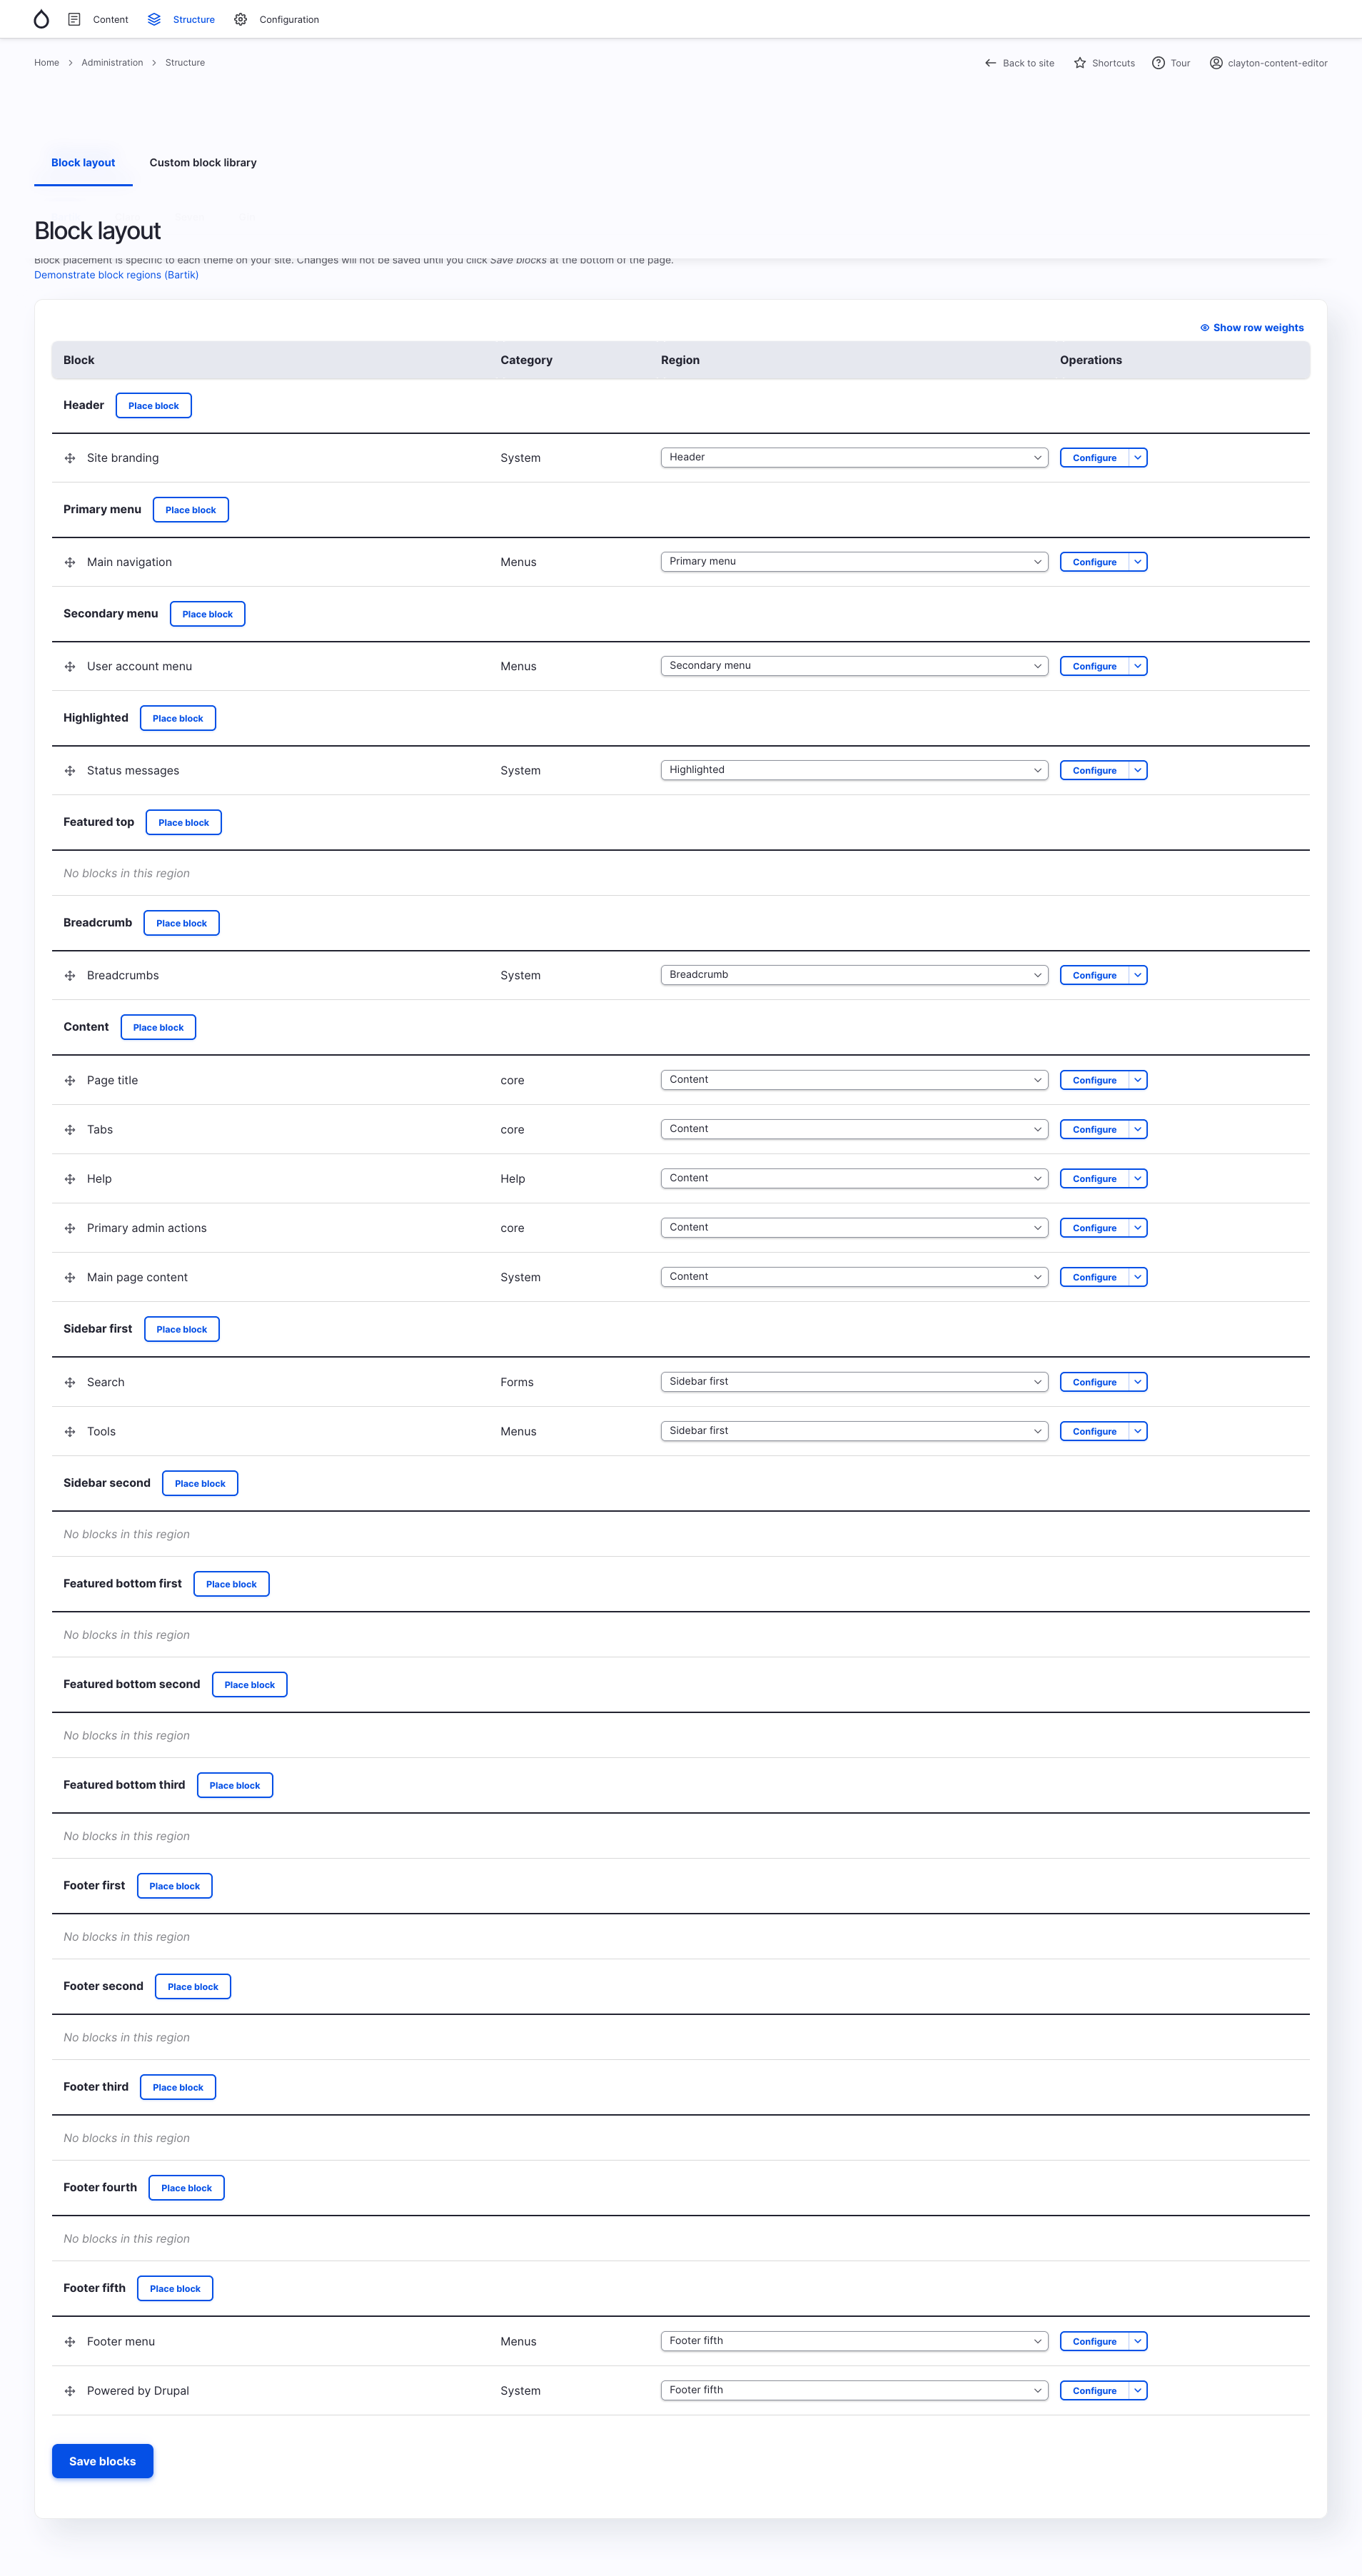
That’s a lot to look at and this is just a vanilla Drupal site! On most sites there are many more blocks to look at. Plus, allowing all users to access blocks that a content editor should never touch adds unwanted risks and vulnerabilities.
There is a Drupal core issue to Add more granular block permissions.
In the meantime, we can use a combination of contributed modules to add granularity to block permissions:
They each take a different approach to granting and restricting access to blocks. They do play nicely with one another so you can use them together to fine tune the block editing experience for a content editor.
Use Block Permissions Module to Restrict Access Based on Theme and Block Provider
The Block Permissions module takes the Administer blocks permission and breaks it down by theme, and by block provider (or, in other words, by what module is making the block available in the system).
The most common scenario is to allow content editors to edit blocks that are in the public-facing theme (in our example, Bartik) and provided by block_content.
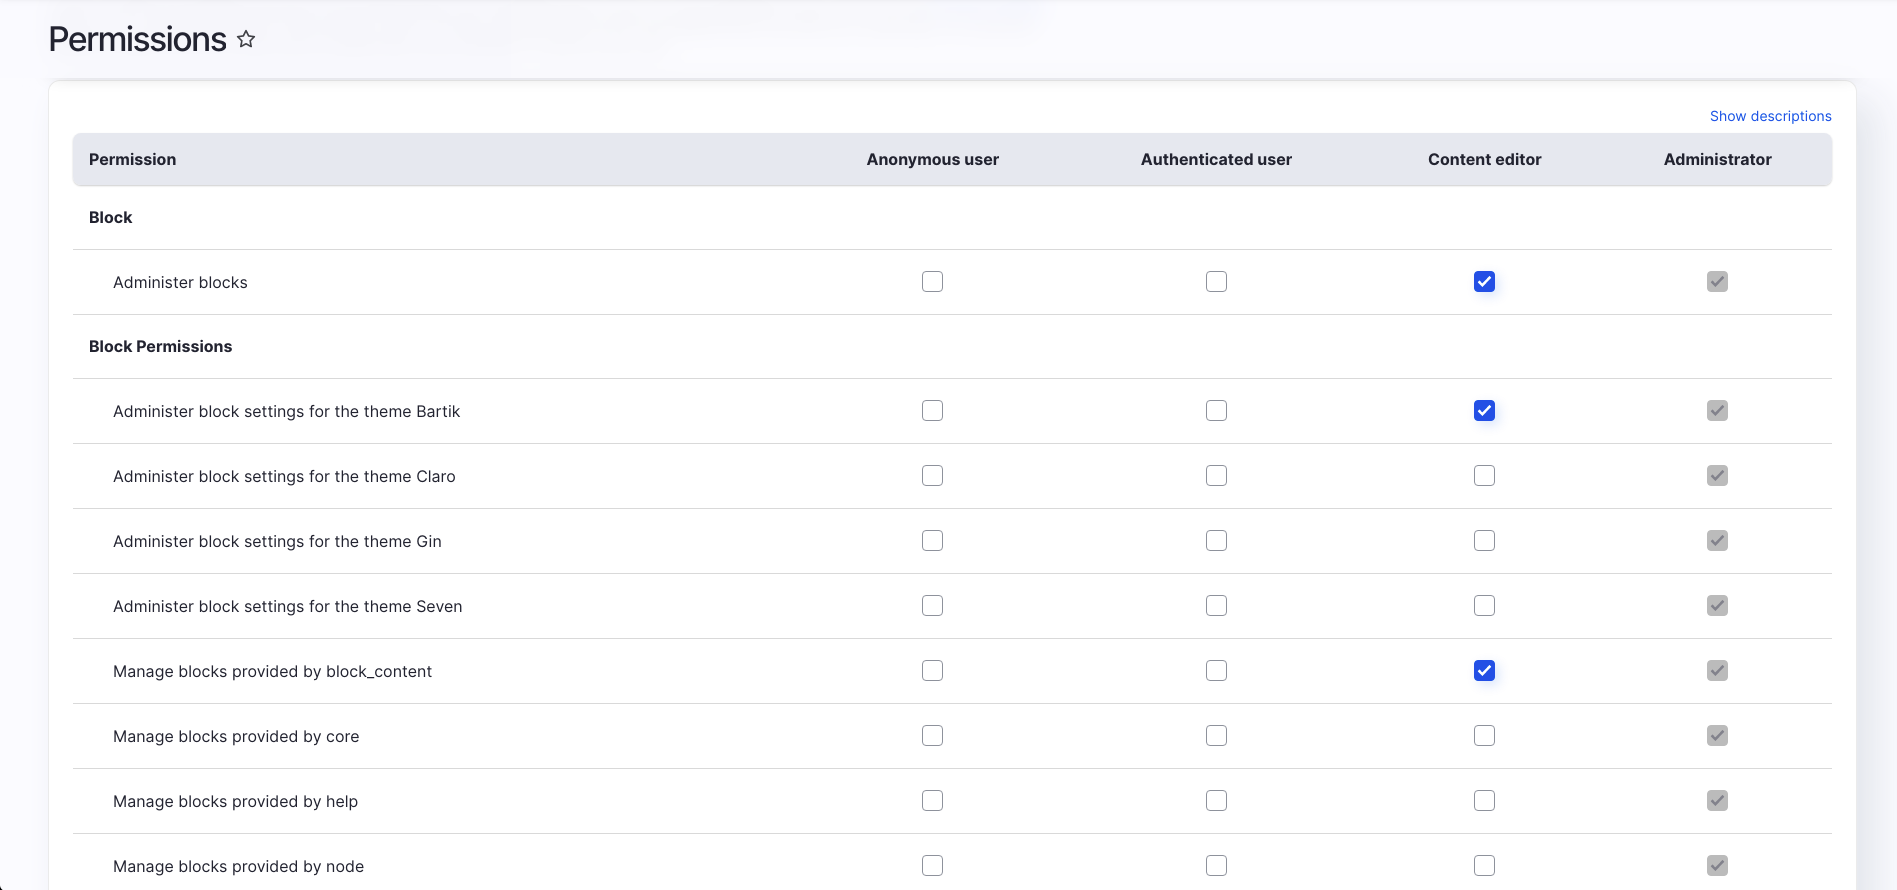
Once you’ve added those extra Block permissions, here is what the content editor now sees.
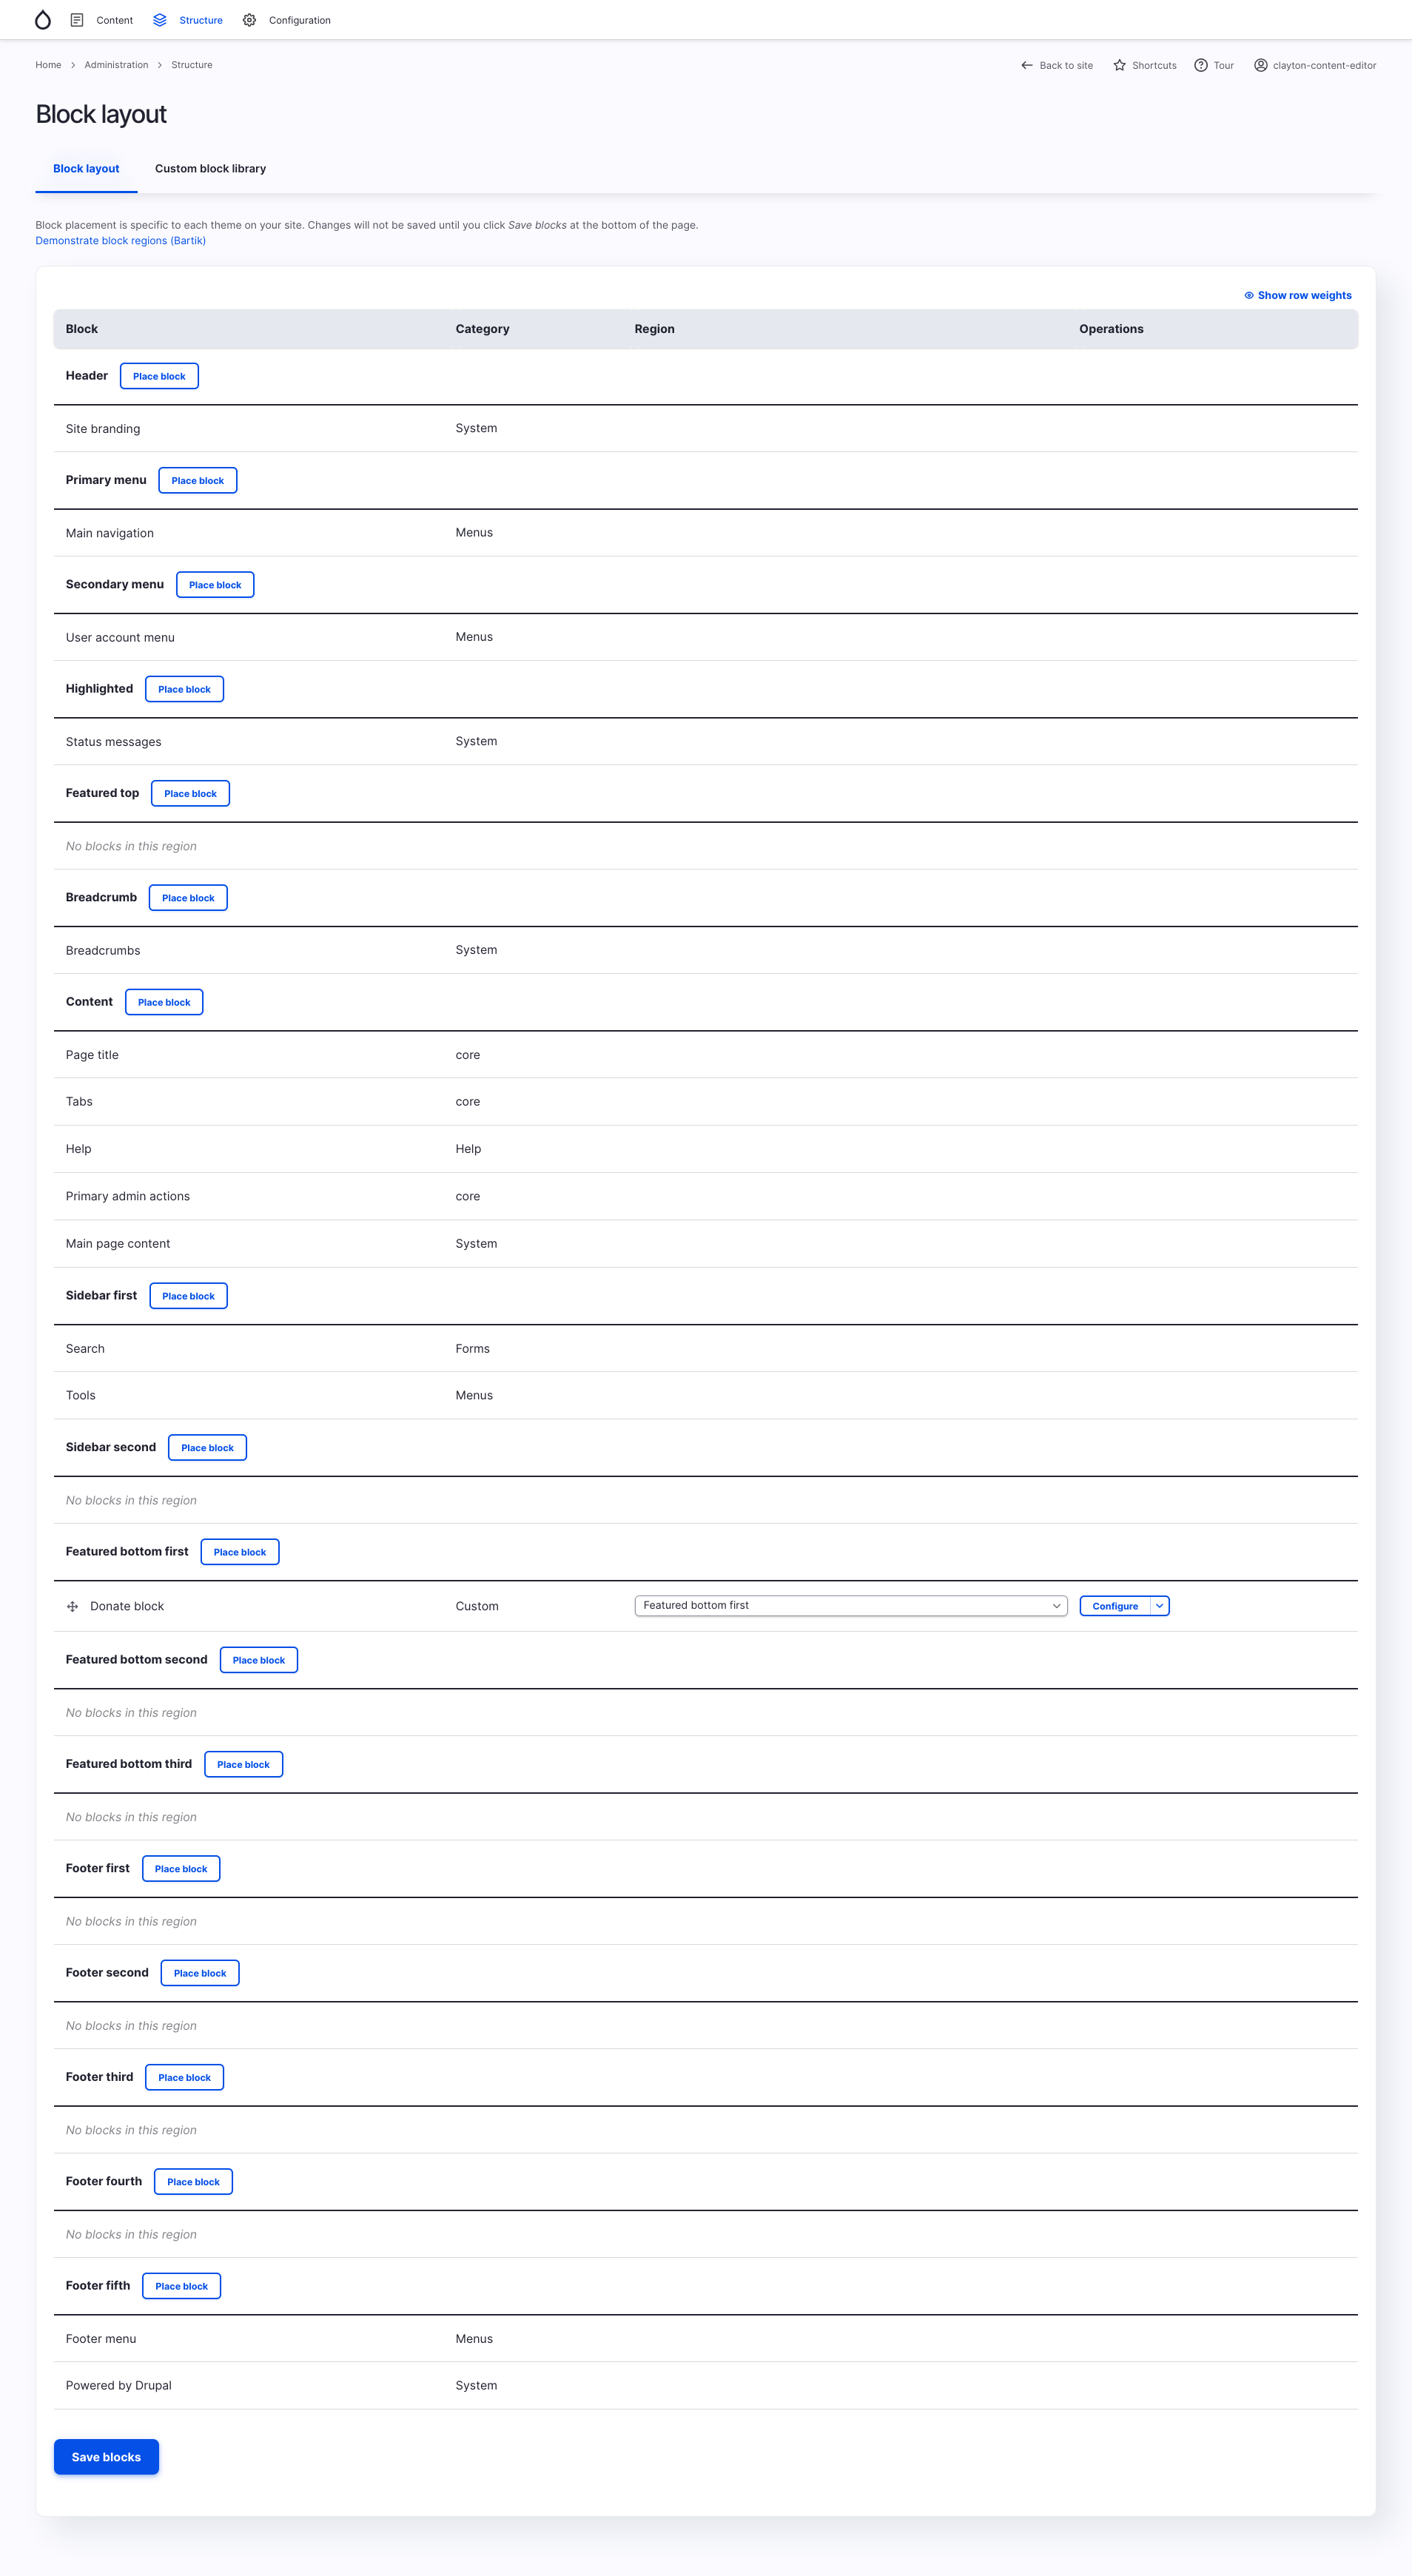
The only Block this content editor is allowed to edit is the Donate block because that is a content block. Everything else is off limits as it should be.
This is a big improvement, though it might still be frustrating to users to have to look at all those other blocks that don’t concern them. One way to simplify this page is to also restrict the regions an editor can access.
Use the Block Region Permissions Module to Restrict Access to Specific Theme Regions
A region is a section of a page in your website’s theme. The main menu is often in a region called Primary Menu, and the page title and content resides in the Content region. If you know your editors will only be editing blocks in specific regions, the Block Region Permissions module is a helpful tool.
In our example, we only have content blocks for editors to manage in the Featured Bottom First region. So we’ve granted them permission to that specific region and no others.

Here is what the content editor sees with access to just that region.
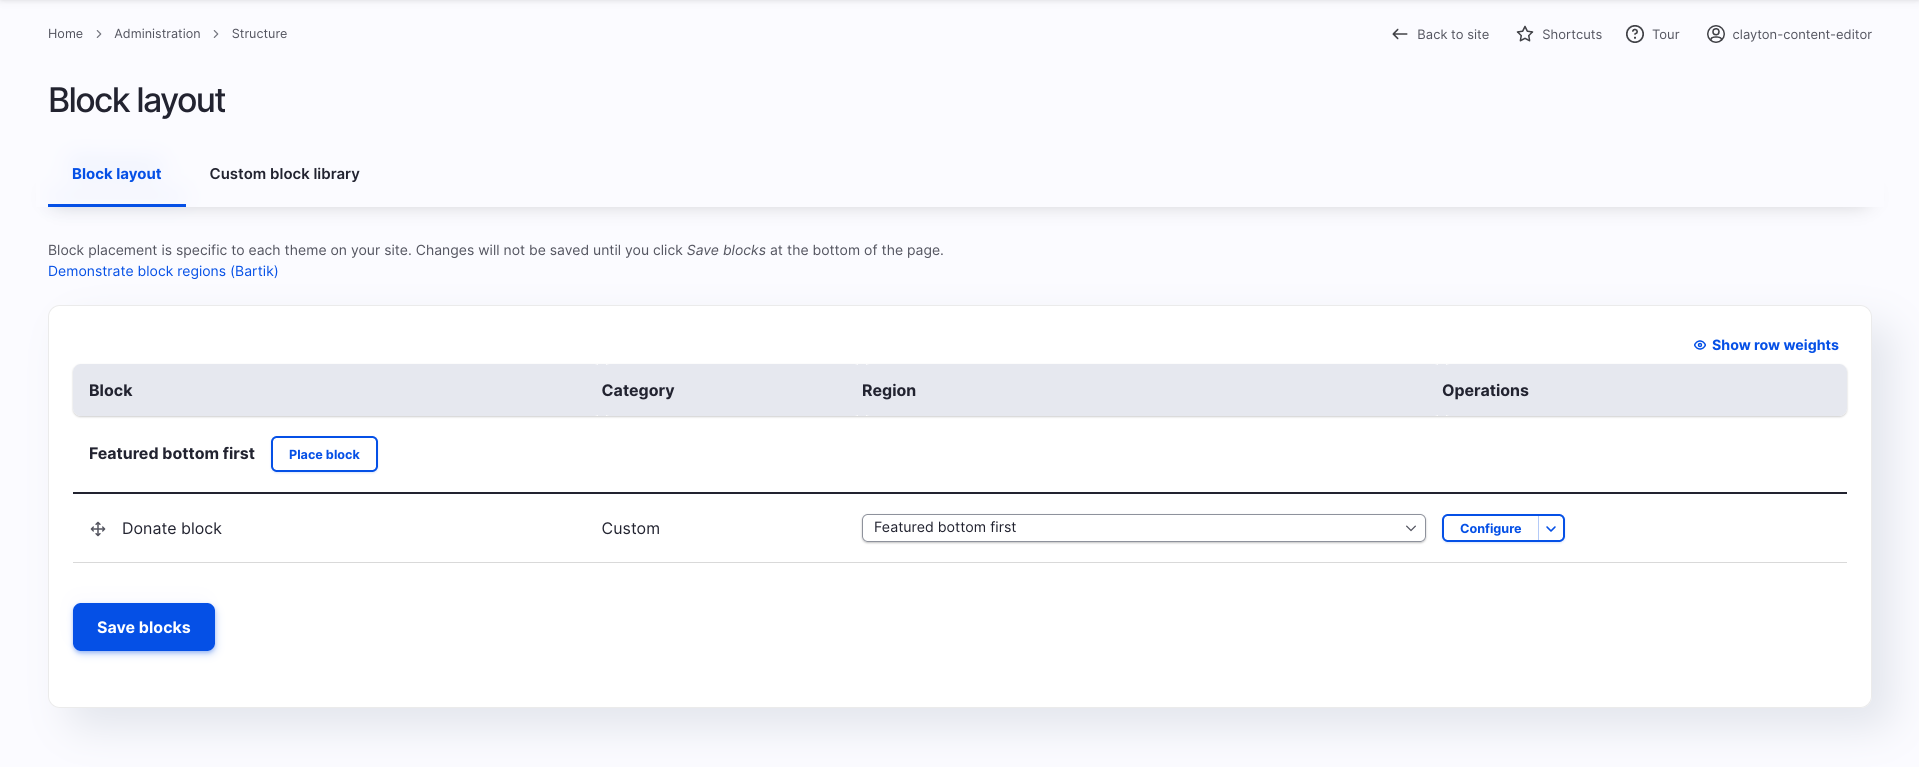
The Block Region Permissions Module pares down the visible regions to only those you’ve granted your users access to.
This is much more manageable. Now the editor only needs to look at the blocks and the regions for which they are responsible.
In the interest of preserving site consistency and integrity, there are a few more block permissions you might not want your editor to have. For this, the Block Content Permissions module comes into play.
Use the Block Content Permissions Module to Restrict Access to Specific Block Types
Just as different content types can be defined, Drupal also allows for the creation of block types. This allows you to associate different fields with different block types.

Usually block types are defined by a developer. If you don’t want your editor creating new types of blocks, or to be able to alter other kinds of blocks such as menus, install the Block Content Permissions module.
This module provides the following permissions:
- Create new block content for x block type
- Delete any block content for x block type
- Edit any block content for x block type
- Administer block content types
- View restricted block content
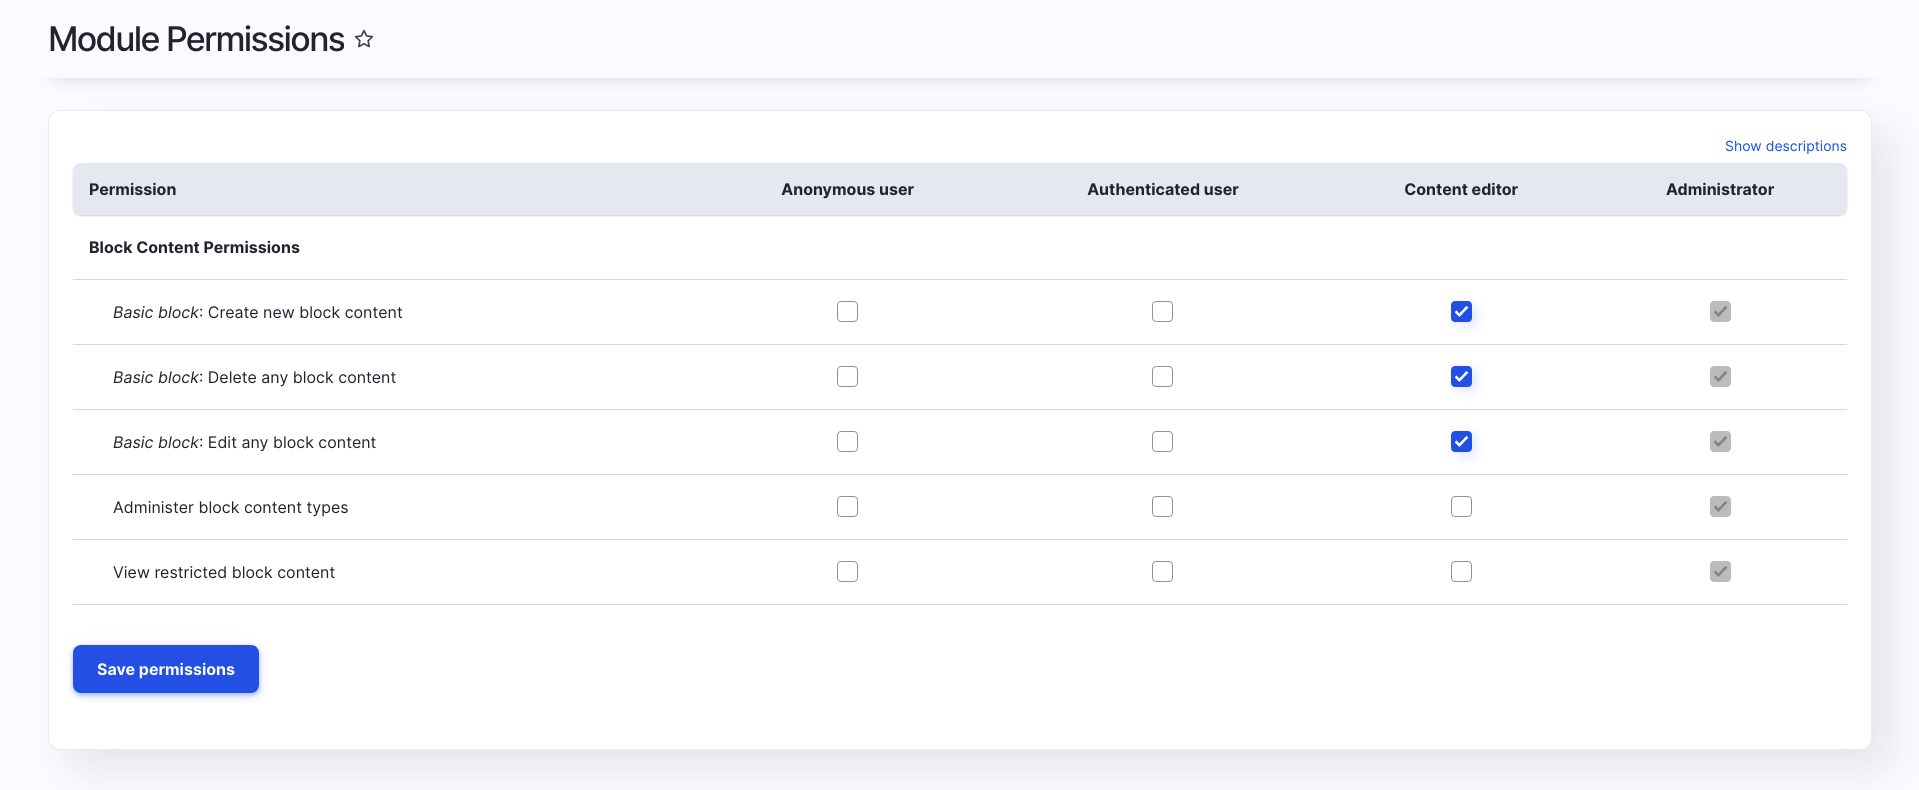
Since we only want our content editor managing block content, we’ve granted them the create, delete, and edit permissions for one block type, Basic.
Now an editor can only create and manage Basic blocks, simplifying the block management experience tremendously.
Conclusion
By taking advantage of Drupal’s flexibility and robust permissions, we’ve customized the administrative experience to make it easier for content editor users to manage content, user accounts, and content blocks.
Keep an eye out for the fifth and final post in this series, where we will show you how to add some authoring tools to ensure your website’s content is as accessible as possible.
Read More: Enhance Your Drupal Website’s Authoring Experience
Open Read More: Enhance Your Drupal Website’s Authoring Experience configuration options

Leave a comment