
In our previous two posts we modernized the admin theme and simplified forms to focus on just what the author needs. Next, we’ll polish up the form fields themselves.
Order & Group Fields Logically
Grouping fields to match authors’ mental models improves workflow and continues our decluttering efforts.
Likely, fields were grouped upon the launch of the website, but it’s common for initial assumptions to be off the mark and in need of adjusting.
We can also group fields together that serve a common purpose. The Law of Common Region states that,
Elements tend to be perceived into groups if they are sharing an area with a clearly defined boundary.
We can use the Field Group module to group common elements together. For example, an Event content type might have a date, time, location, and price associated with it. We can group these together into an Event Details field group.
Field Group gives us the option to display a group as collapsed or expanded by default.
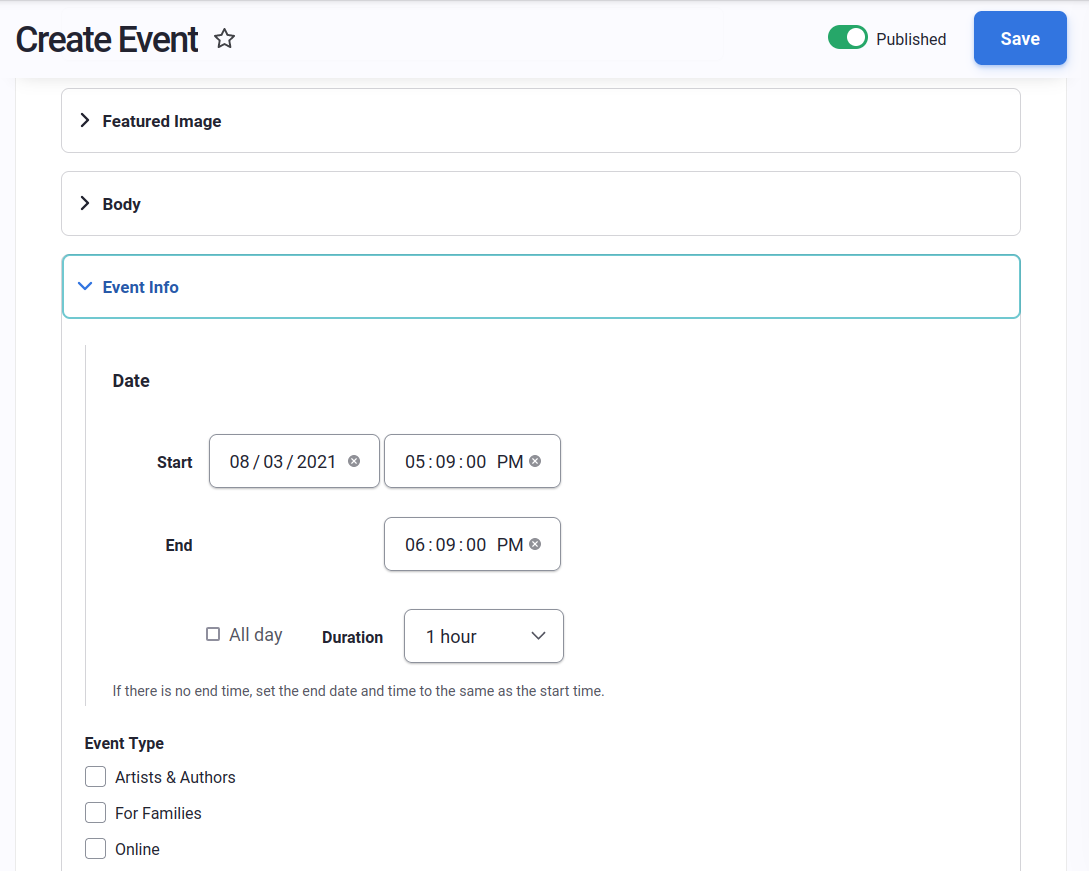
Consult with content authors as well about their workflows. Do they typically draft content with only info for a few fields first? How often do they return to edit a page? There might be some fields that get rarely edited, and they can be grouped together in a field group that is collapsed by default, while other fields that are updated regularly should be easy to view and edit right away.
For a full tutorial on what Field Group can do, check out the Field Groups blog post by Sarah Carney.
Provide Character Limits with the Maxlength Module
One of the most challenging aspects of writing effective web copy is being concise. Oftentimes an author will write verbose teaser text that compromises the visual design and adds unnecessarily cognitive load for users.
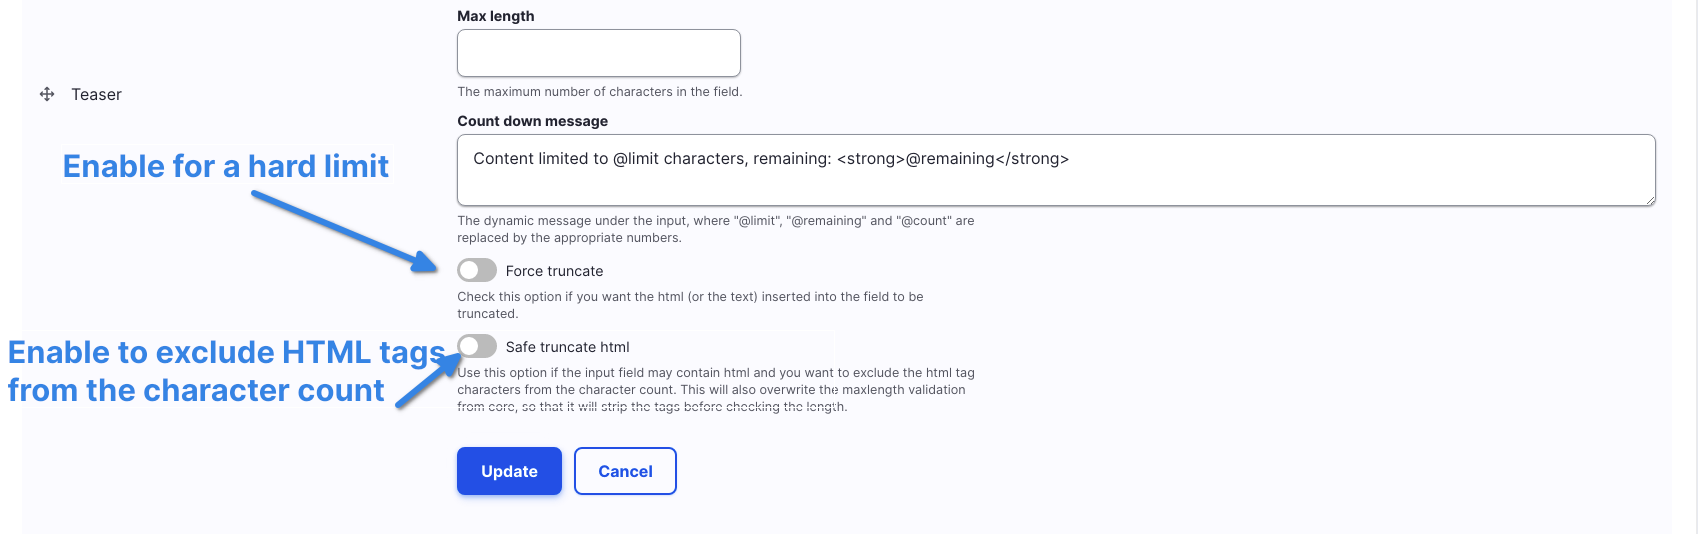
The Maxlength Module allows us to set character length limits for text fields. I liked this module so much that the DevCollaborative team and I became co-maintainers of it!
We are improving the user experience of the module, but for now, to set a character limit, navigate to the Manage form display settings for the desired content type.
Click into the widget settings of the field to which you want to add a character limit.
Set the maximum length you want. For a hard limit enable Force truncate. If it’s a rich text field, enable Safe truncate html to prevent HTML from getting chopped off and breaking on the front-end.
Fix the Height of Text Fields with the CKEditorHeight Module
Sometimes when we create a text field intended for a short amount of text, we want the text field to be appropriately shorter in height.
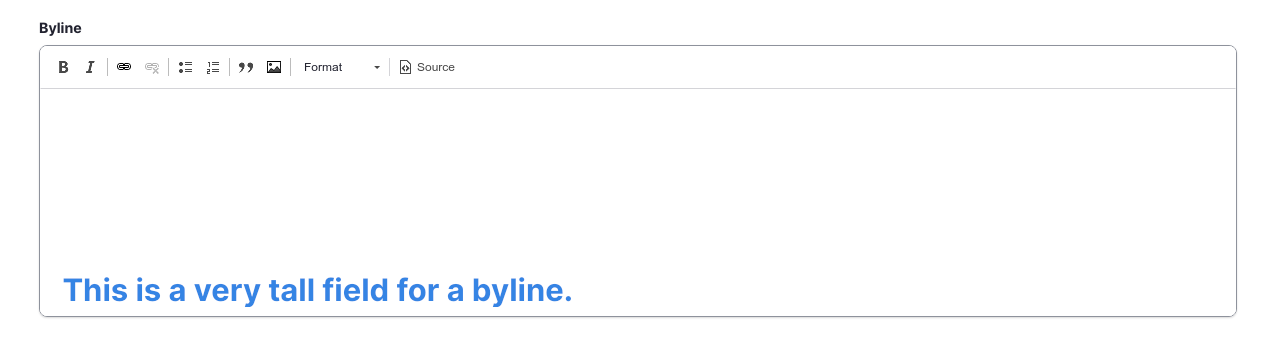
Under Manage Form Display, there is a setting for a text field’s row height. However, as the help text warns, CKEditor overrides this, leaving you with the same five-row-high text field.
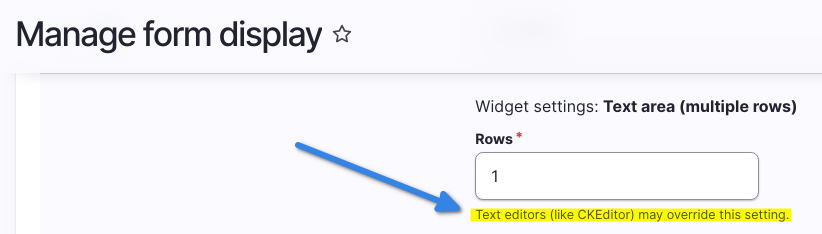
Until this issue in Drupal Core is resolved, you can fix this with the CKEditor Height module. Simply install and enable the module and that row setting will not get overridden.
Use Radio Buttons & Checkboxes Over Select Lists
When it comes to fields with options to choose from, radio buttons and checkboxes add the least amount of cognitive load for most users. Nielsen Norman Group’s list of guidelines suggests that:
- Radio buttons be used for a list of two or more mutually exclusive options;
- Checkboxes be used for lists where any number of options can be selected;
- A standalone checkbox be used for a single option that can be turned on or off.
Use Autocomplete for Large Data Sets
There may be times when a list of options is so long that a radio button or checkbox approach feels unwieldy. In that case, an autocomplete field can be helpful. However, an autocomplete field prevents a user from being able to take in the entire list of available choices . That affordance isn’t always worth it. Also it’s wise to interrogate the information architecture and content itself. Is it necessary to have so many options? Is that level of granularity unnecessarily siloing content?
If an autocomplete field is indeed the best choice, Drupal offers two autocomplete field widgets out of the box:
- Autocomplete
- Autocomplete (Tags style)
Both widgets allow a user to search on the title of the entity. Once chosen, the title and its node id are displayed. The Tags style allows the author to create new entities on the fly. By default, the matching is done using the contains rule, but you can change this to starts with if you’d like.

Enhance the Autocomplete Experience with an Entity Reference View
A common issue with autocomplete fields is that they can return ambiguous results. You might have two pages on the site with the same title. Most people aren’t keeping track of the node ids of their pages. Another way to identify a page can be handy.
The power of the Views module comes to the rescue again. We can override the default autocomplete behavior with a View that is custom-tailored to our authors’ needs.
Take for example, a Related Events field. In this case we have a Storytime event that happens every week. It’s always called Library Storytime but there are separate nodes for each event. To tell them apart, we can include the event date in the autocomplete result.
To do this, create a View with a display type Entity Reference.
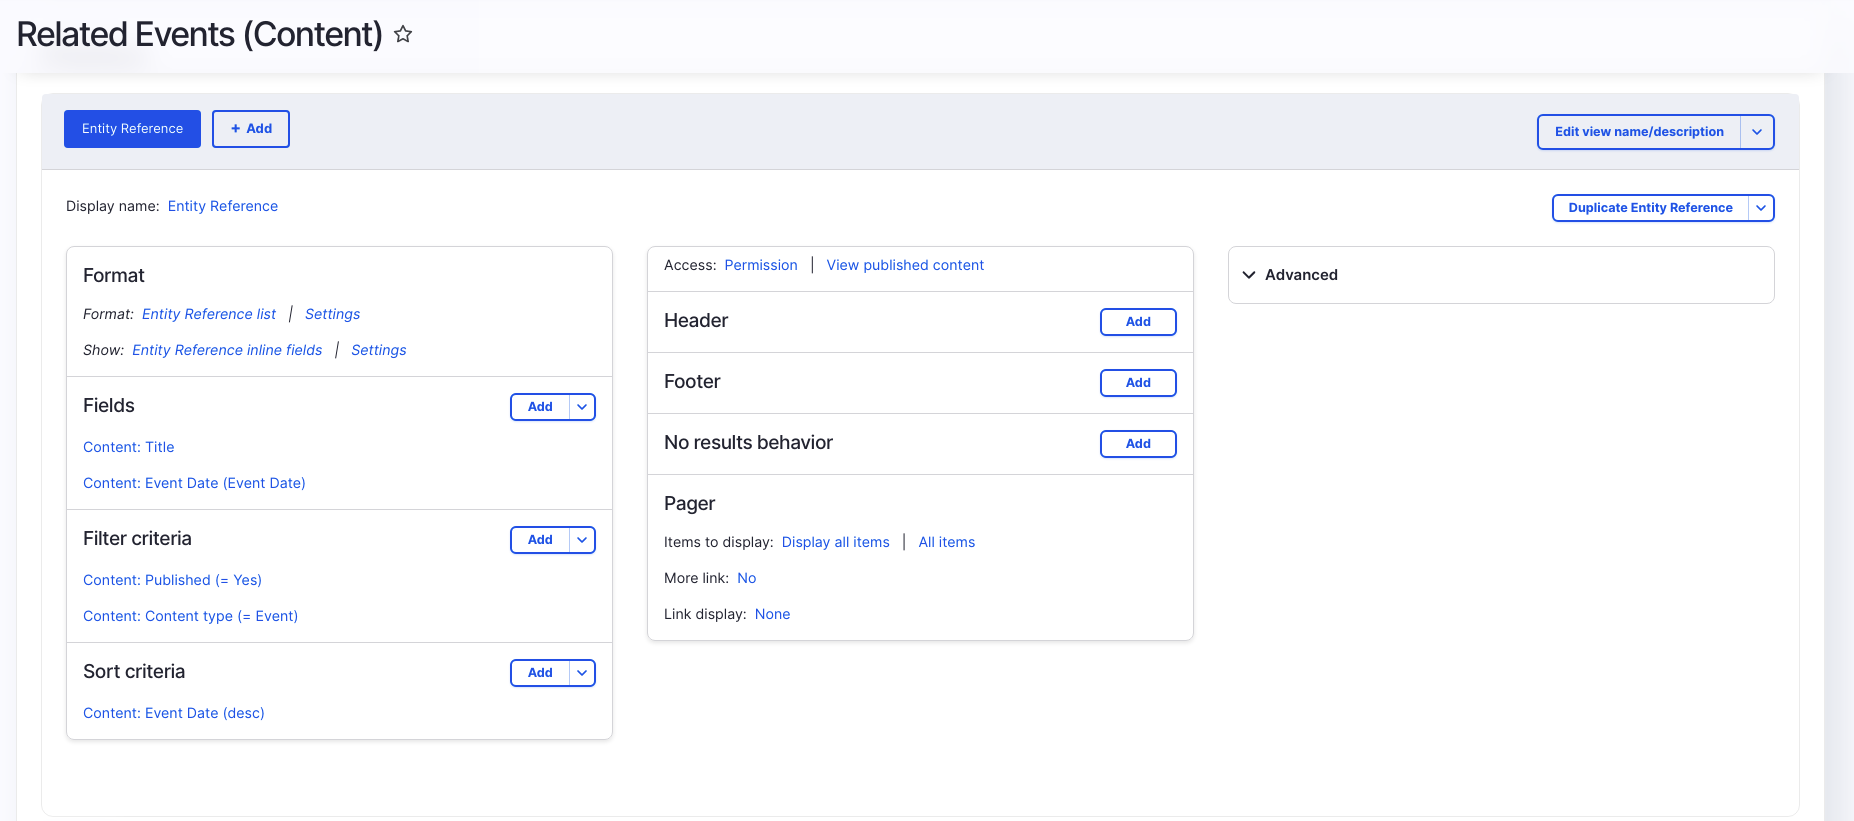
You can create an Entity Reference View to search on and display exactly what you need for each of your entity reference fields.
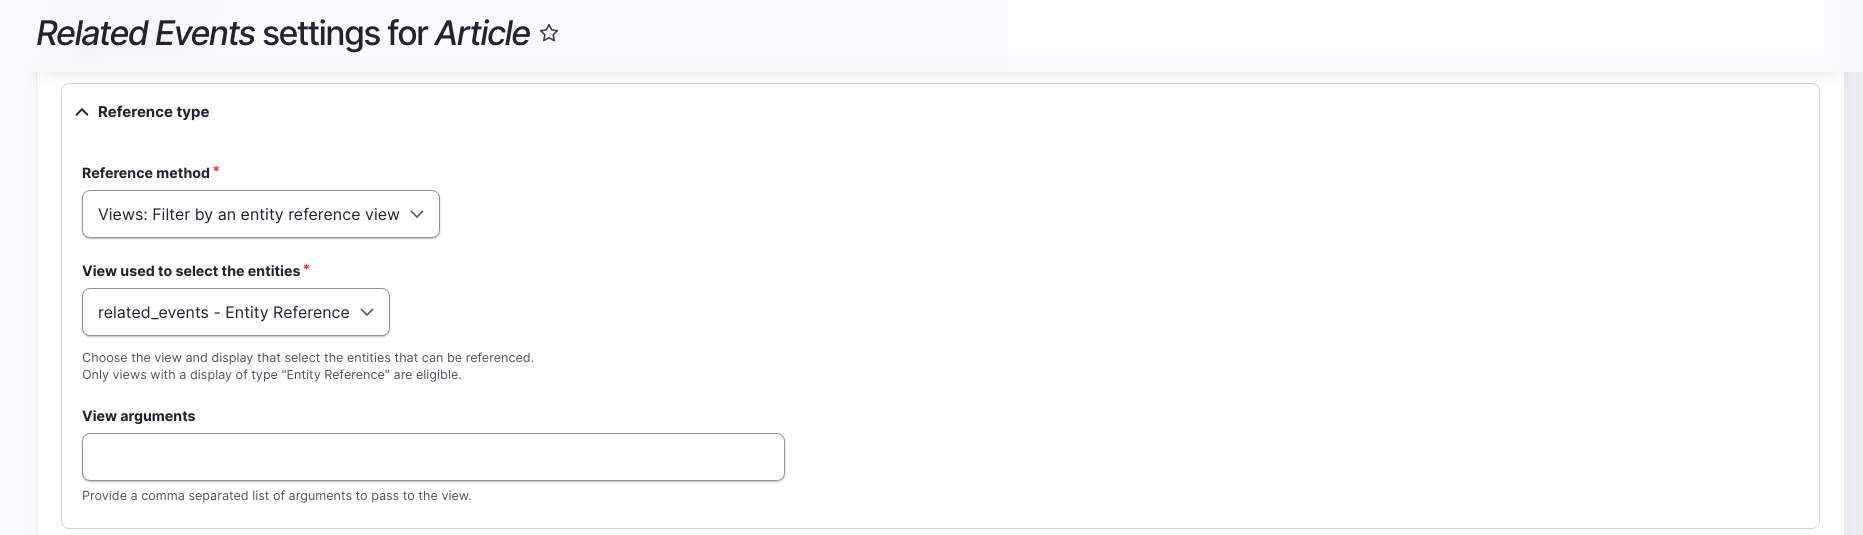
Then in the Field settings for the desired entity reference field, change the Reference method from Default to the Entity Reference View you just created.
Now authors can see the event date of the autocomplete results and choose the right Storytime event.

For further information, check out the tutorial, How to Use Entity Reference Views in Drupal 8 by Daniel Pickering.
Part 3: Conclusion
Drupal is a powerful tool for creating structured, complex sets of data. This can lead to unwieldy forms. But with logical grouping, appropriate field formats, and polished workflows, we can make the entry process for even the longest forms manageable and intuitive.
In our next post, we’ll widen our usability focus to improve the administrative pages that authors use to manage content, users, and blocks on your website.
Leave a comment